HTML Basics For Bloggers
Things happen on the back end of your blog. These things happen whether you want them to or not, so having a basic understanding of hypertext markup language will help you help keep your blog running to optimal capacity.
What is HTML?
HTML is a system of codes that allows you to do things like bold text or insert hyperlinks into a blog post. HTML tells a computer how a web page will display. What you see on the front end of a blog post looks as it does because of what happens on the “back end” or the HTML.
Ninja Tip: A good way to improve HTML skills is to see how others have coded their pages. Click within your browser’s VIEW option, then select SOURCE or PAGE SOURCE. A window will then open which displays the page’s HTML. You can even view the source HTML for this page. Go ahead, try it.
Things I Do Frequently
Every time I blog, there are things I do with the HTML code, and these are some of the HTML basics this post will spotlight.
Here’s a screen shot of the back end of a post, where HTML code resides (in WordPress). To view this screen, toggle to the “TEXT” tab of a blog post:
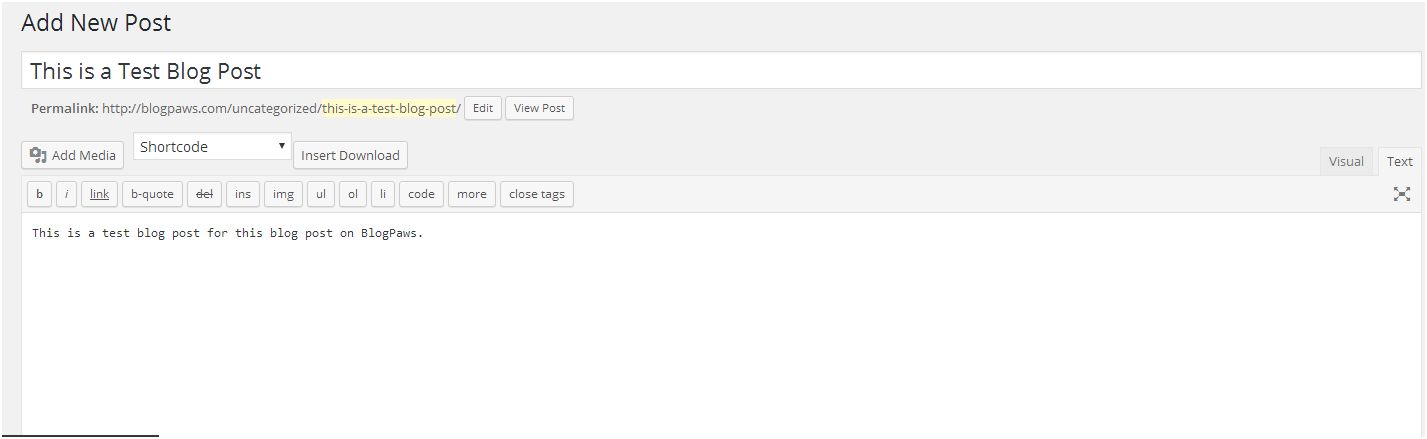
Note: If you try to put HTML code on the visual or front end of your blog, it won’t work and will look funky. HTML coding must take place in the TEXT view, not the visual view.
No Follow Tag
If you’ve participated in a sponsored campaign–through the BlogPaws network or otherwise–you’ve likely seen the requirement to use a nofollow tag. Every blogger should have an understanding of how to use the nofollow tag and why. Fortunately, it’s really easy.
Our Director of Influencer Marketing, Felissa Elfenbein, shared in the nofollow best practices post, “When you share sponsored content your readers can see and understand the words ‘this is sponsored content.’ When it comes to the bots that Google and other sites send out to check out your blog, they cannot read those words but they can read and understand HTML code.”
Here is a video of how nofollow code works and how to embed it with ease:
Bold
In HTML language, bold is helpful when you want a widget or title to stand out. Like this:
<STRONG> I am a pet blogger. </STRONG>
You’ll notice the / mark in the closing text. The slash marks indicates where the command ends. In this example, STRONG is HTML code for bold. Everything in between the STRONG HTML coding will be bold.
Italics and underline work in much the same way.
Link Creation
Want someone to click on a link within your blog post? I find that knowing how to code it in HTML helps me on the front end, too. Here is an example:
<a href=“https://www.blogpaws.com”>Online Source for Collaboration and Learning</a>
In the above example, when someone clicks on Online Source for Collaboration and Learning in my blog post, they will be directed to the BlogPaws website, like this:
Online Source for Collaboration and Learning
You should always hyperlink your anchor text to something that people would naturally search on and not words like “click here.” How often do you search “click here” in Google? Exactly.
New Window
When someone clicks on a link within my blog post, I want them to still have access to the original post and not be taken away from it. You achieve this by enabling a new window when a hyperlinked is clicked. Let’s use the above example:
<a href=“https://www.blogpaws.com/”>Online Source for Collaboration and Learning</a>
As it stands, a whole new window will open and folks are taken away from the original post. However, if I code it like this:
<a href=” https://www.blogpaws.com /”>target=”_blank”> Online Source for Collaboration and Learning </a>
a whole new window will pop up that takes me to my desired site (anchor text) without losing the original content. Notice the red content, and that is the code to embed. Red is designated here to call attention to you but you don’t need to use red when you code.
Images
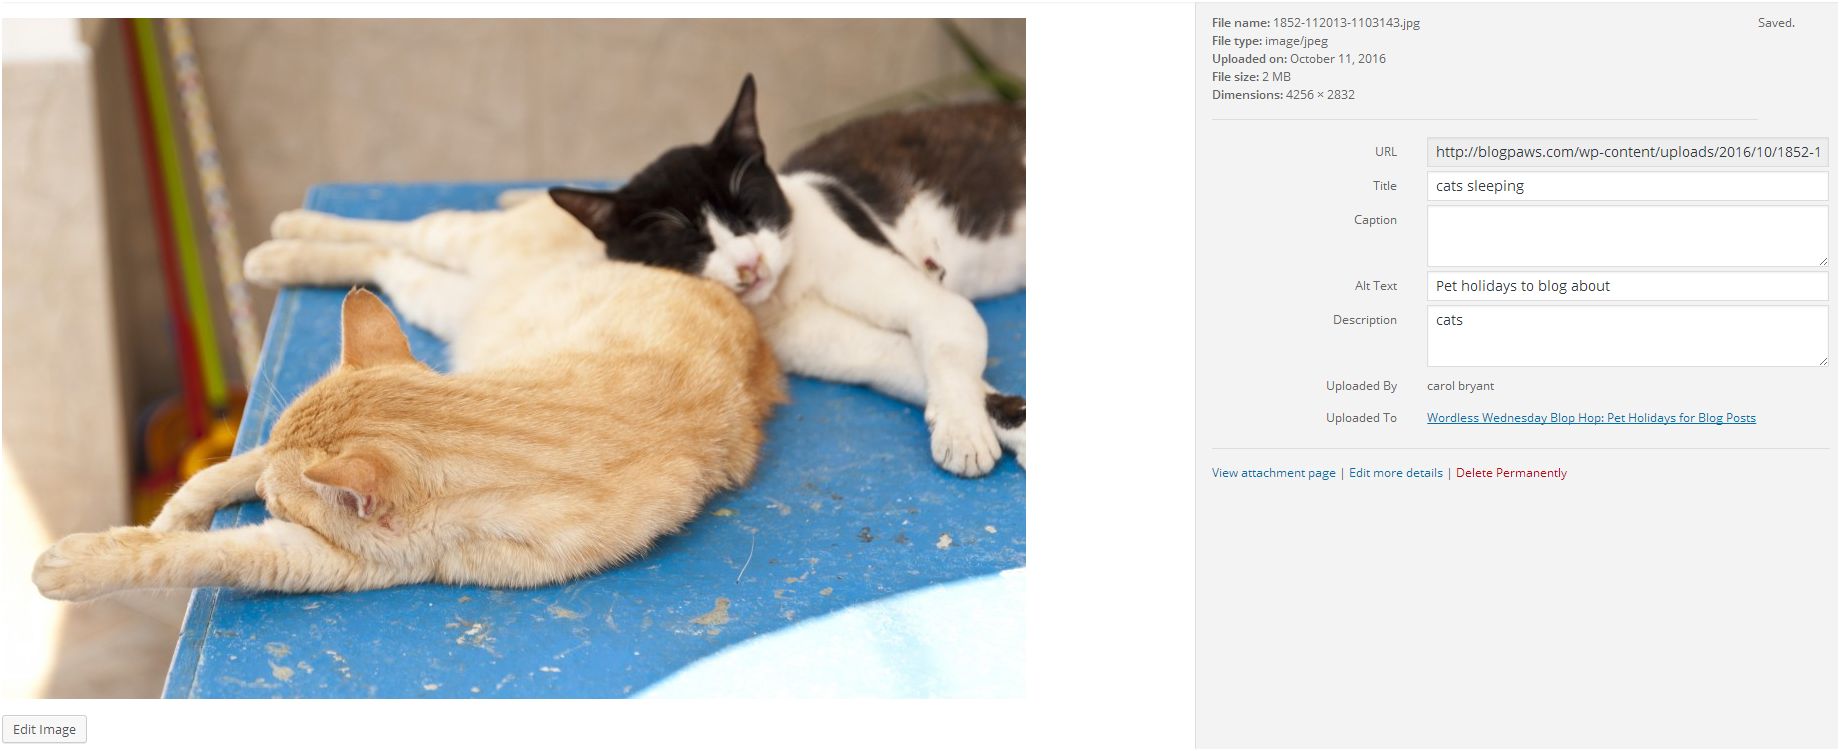
Images display in blog posts by first uploading them as media to your blog. In this example, let’s assume you have an image file called “catssleeping.jpg” that you want to use in a blog post.
Once you’ve uploaded the compressed and properly sized image to the post, notice the URL to the image. To do this, go to “Select Files” button, Browse to find the catssleeping.jpg file, and a URL is listed for that particular image like this:
You can take that code and insert the image into a page or a post like this:
<img src= “https://blogpaws.com/wp-content/uploads/2016/10/1852-112013-1103143.jpg”/>
The tag “img src” lets you know where the image file is located and will then display that file as long as the image is there in the path. The img tag does not require a closing tag as other HTML coding does.
Headings and Subheadings
These make a blog post more aesthetically pleasing and digestible to your reader. Most folks won’t stick around to read a blog post if there it is jumbled, tight, and without some sort of visual cue to break the text up into digestible pieces.
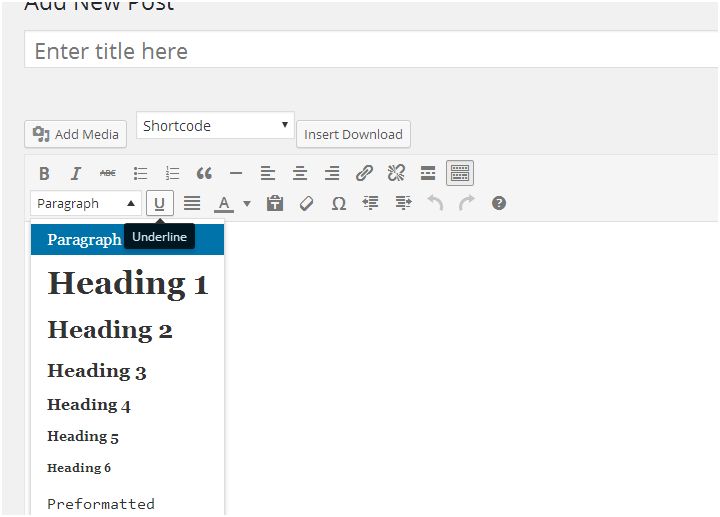
Some basic subheadings include H2, H3, and H4 so that they appear in a certain way in the body of the post. Look at the different headings in this blog post. Those were created with the H2 subheading.
On the front end, or the visual portion of a blog post, you can find these formatting options here:
On the back end, they appear this way:
<h2>Level 2 Heading</h2>
<h3>Level 3 Heading</h3>
<h4>Level 4 Heading</h4>
Ninja Tips: According to Yoast.com, there are a few basic tenets to know about HTML headings and subheadings. They are:
- The most important heading on the page should be the H1.
- There is usually only one H1 on any page.
- Sub-headings should be H2’s, sub-sub-headings should be H3’s, etc.
- Each heading should contain valuable keywords, if not, it’s a wasted heading.
- In longer pieces of content, a heading is what helps a reader skip to the parts that they find interesting.
Learn more about formatting your blog content for SEO.
Additional Resources:
Best Practices for No Follow Coding
3 Steps To Make Your Blog More Secure
What HTML issues do you struggle with and how can BlogPaws help?
Carol Bryant is the Marketing and Social Media Manager for BlogPaws and runs her own blog, Fidose of Reality and its fundraising arm, Wigglebutt Warriors. When not busy playing with her Cocker Spaniel, Dexter, she stays far away from cooking. Her trademark is her mantra and is tattooed on her arm: My Heart Beats Dog.®
Images: Igor Normann/Shutterstock.com and Sheila Fitzgerald/Shutterstock.com


