Getting the Most Out of Your Phone for Photoshoots
Not everyone can afford expensive lighting equipment, cameras, shutter releases, tripods, photo-editing software… but those tools are not required to take quality photos of your furry friends, anyway.
Despite what you might think, it is 100 percent possible to produce beautiful images, ideal for social media platforms like Instagram and Tumblr, using only the little camera on your cell phone.
In this quick tutorial I’ll be talking about lighting, composition, in-phone editing, and the best ways to make the most of all the tools already at your disposal, tucked inside of your pocket.
While I’ll be using my iPhone 6, everything I go through here should also be available on most smartphones currently on the market.

Lighting
The first thing we’re going to discuss is lighting, which exists in two forms: natural and artificial.
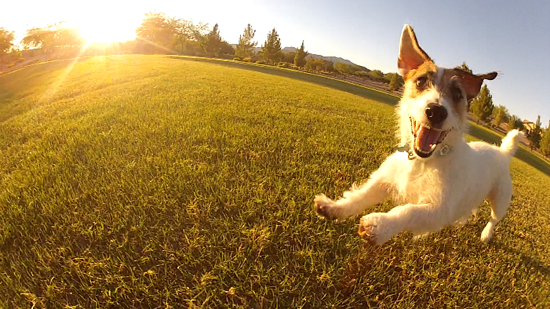
Natural lighting consists of daylight (or moonlight) from outside, whether you’re stretched out on the grass on a sunny day, or some blue light is filtering through your curtains while it’s overcast.
Artificial light includes overhead fluorescent lights, table lamps, box lights, as well as campfires, candlelight, etc.
The best time to take photos is at dawn or dusk, which is referred to as the “golden hour,” or “magic hour,” of photography. This is because midday light tends to be too harsh, and nighttime light is, well, dark.
These same rules apply whether you’re taking portrait photos, landscapes, or even snapshots of your soft friends. (Turtles, lizards, fish included.) Keep in mind, also, that the light which is most flattering to humans tends to translate even to animals, too: soft, diffused, and controlled.
Composition
In photography there exists the “rule of thirds,” which is a guideline to where subjects in a photographic composition should fall in order for it to be most appealing and natural to a viewer’s eye.
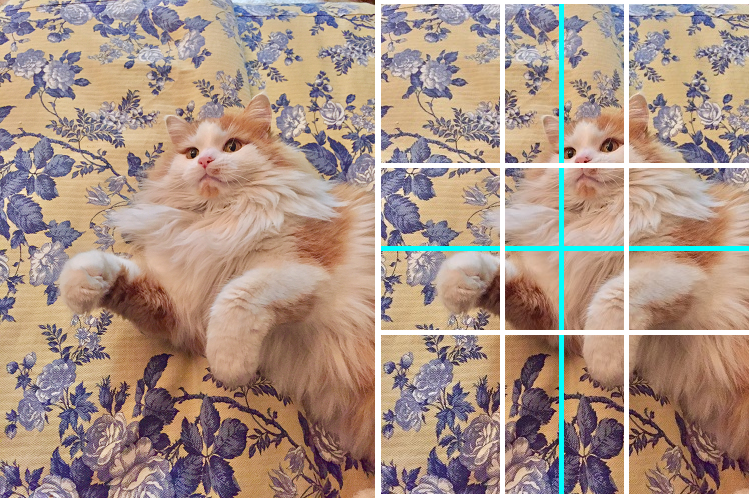
The white lines here split the image into thirds both vertically and horizontally, and the cyan lines indicate the center point. Take a look at where Stanley’s paws, nose, ears, and eyes fall within the grid, and how they are barely off center– but you hardly notice in the first image, where the grid is not present.
A few other things to keep in mind to ensure your photos appear clear and intentional:
- Avoid background noise, such as shoes, clothes, toys, a messy carpet, etc. If your furry friend is supposed to be the center of attention, make it that way!
- Because the camera is not as powerful or sensitive as that in a DSLR, try to avoid taking action photos (they may turn out blurry!), photos in dim light (while the subject might be visible, the overall image is likely to be grainy!), and try and avoid using the flash, if you can help it. (If you must, though, try instead a box light or desk lamp, and diffuse the light in order to make it less harsh on the subject.)
Editing
The possibilities are truly endless (that might be an exaggeration, but who wants to do the math?) when it comes to editing photos, particularly in terms of the options you’re already supplied with.
If you’re unfamiliar with editing processes, the menus may seem a little intimidating, but I’m going to go step by step through the editing process I applied to these photos. Afterward, I invite you to take some of your own and go through each editing option, experimenting for yourself until you find a formula you like!
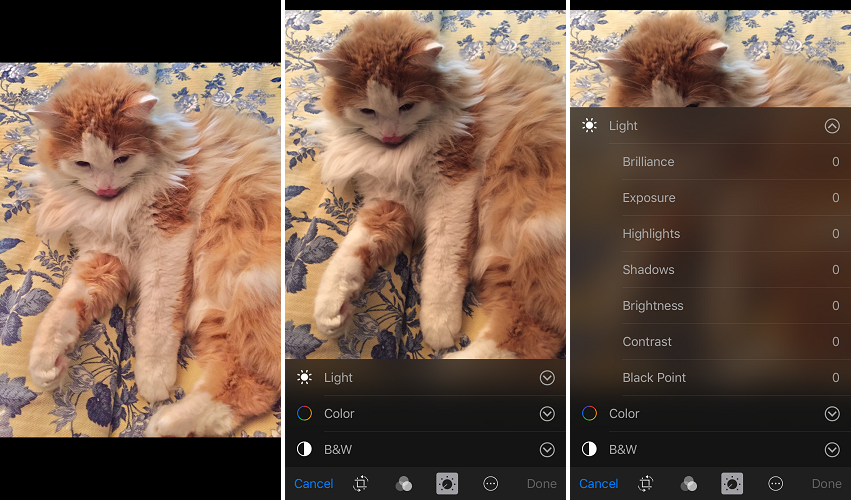 On the left here, you can see the original image we’ll be working with, and in the middle and on the right, the photo-editing menus you’ll find under the settings. Every option is currently listed at 0 (except for the “Intensity” in B&W, but since our image is in color, we won’t be messing with that tab anyhow).
With this image, we’ll be focusing on five alterations:
Under the “Light” tab:
- Brilliance
- Shadows
- Contrast
Under the “Color” tab:
- Saturation
- Cast
If any of these words scare you, don’t worry; I’ll explain each one as simply as possible as we go through them!
And so, let’s take a journey through Brilliance, Shadows, Contrast, Saturation, and Cast.
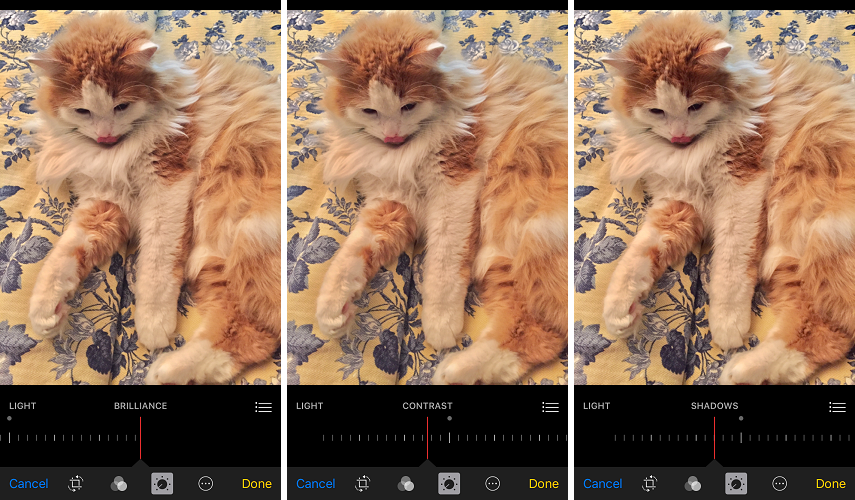 Brilliance: The lovechild between Saturation and Brightness/Contrast. Bumps up the color while also having an effect on the highlights, or shadows, depending on which way you toggle the slider bar.
Contrast: Adjusts the tonal value of the image, increasing or decreasing the overall contrast (heh) between “light” colors and “dark” colors (the dark blue of the flowers vs. the white of his fur.)
With the slide-indicator to the far right, there will be a visible difference between darks and lights, and if the slider is on the far left, the overall image will appear less dimensional, almost gray, therefore “flattening” it.
Shadows: Adjusts “darker” tones, not only blacks, making them appear richer. Slider works opposite of the contrast slider: with the indicator on the far right, the image will flatten some, and on the far left, it will deepen.
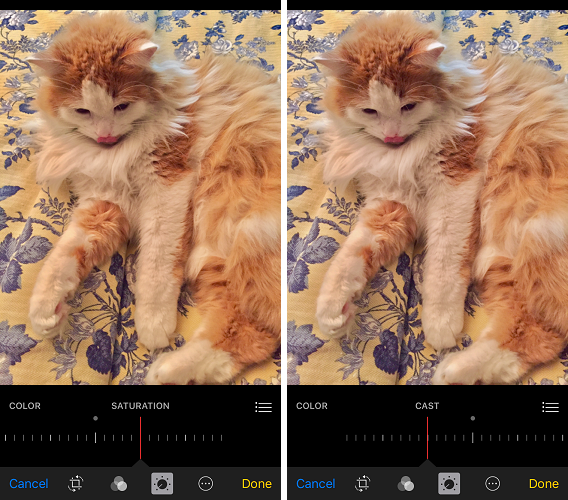 Saturation: Increases the color of the image, taking it from an apparently washed out gray-brown-white, to a brighter yellow-orange-blue.
Cast: While I’m not familiar with this tool (by this name, at least) in any Adobe products, it adjusts the overall temperature of the image, between warm (yellow/orange/red) and cool (blue, purple, green).
 My overall edit ranges came out to:
- Brilliance: 1.00
- Shadows: -0.20
- Contrast: -0.17
- Saturation: 0.34
- Cast: -0.36
And you can see the difference between the two:
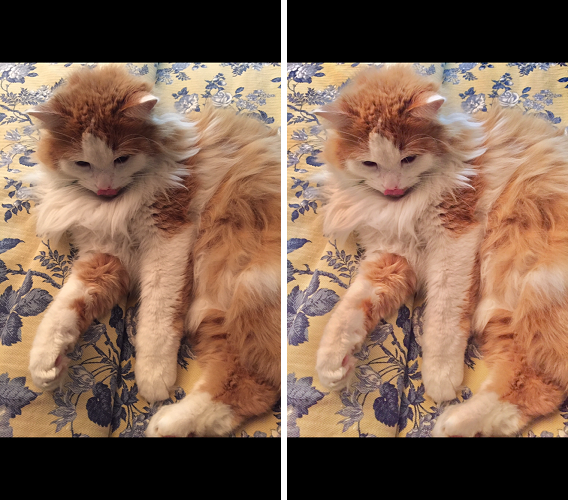 The most important thing to keep in mind when editing your photos, whether it be through Photoshop, your phone, or even when using Instagram filters, is that less is more. Unless heavy filtering is your overall style, the more natural the photos appear, the more professional they’ll appear.

Conclusion
While there is no cut-and-dry, step-by-step rulebook for taking photographs, just like there’s no exact rules in making music, making art, making anything, really– there are certainly some conditions that can work to make your photos appear more desirable, cheerful, colorful, etc., etc.
Keep updated with some of the web’s most influential pets, and take what you see in them and apply it to yourself, while adding a personal twist. Research tips on photography, editing, writing, anything that might get in the way of your pet becoming an online sensation!
Take the time to find your own editing style, whether you like things over saturated and popping with color, more muted and moody, hazy, crisp, blue, yellow… you have the world at your fingertips once you familiarize yourself with all of the tools at your disposal.
Kelsey Morgan is an avid cat-person, and current stepmom to Stanley, who is making his debut in this photo tutorial. You can find more of her ramblings and art on her blog.
Lead image: Dario Lo Presti/Shutterstock.com
All other images courtesy of the author