How to Create Blog Photos That Brands Love
Pictures say a thousand words, and if you are a blogger who works with brands: Pictures can make or break a post. Many veteran bloggers I’ve spoken to over the years believe quality photos or just as if not MORE important as the blog content. The bottom line is: Photos are important. We live in a highly visual world. Think about the success of social media platforms like Pinterest and Instagram. We want to scroll, tap, like, and move on to the next…and then some more. If you’d like to know how to create blog photos that brands love, keep reading.
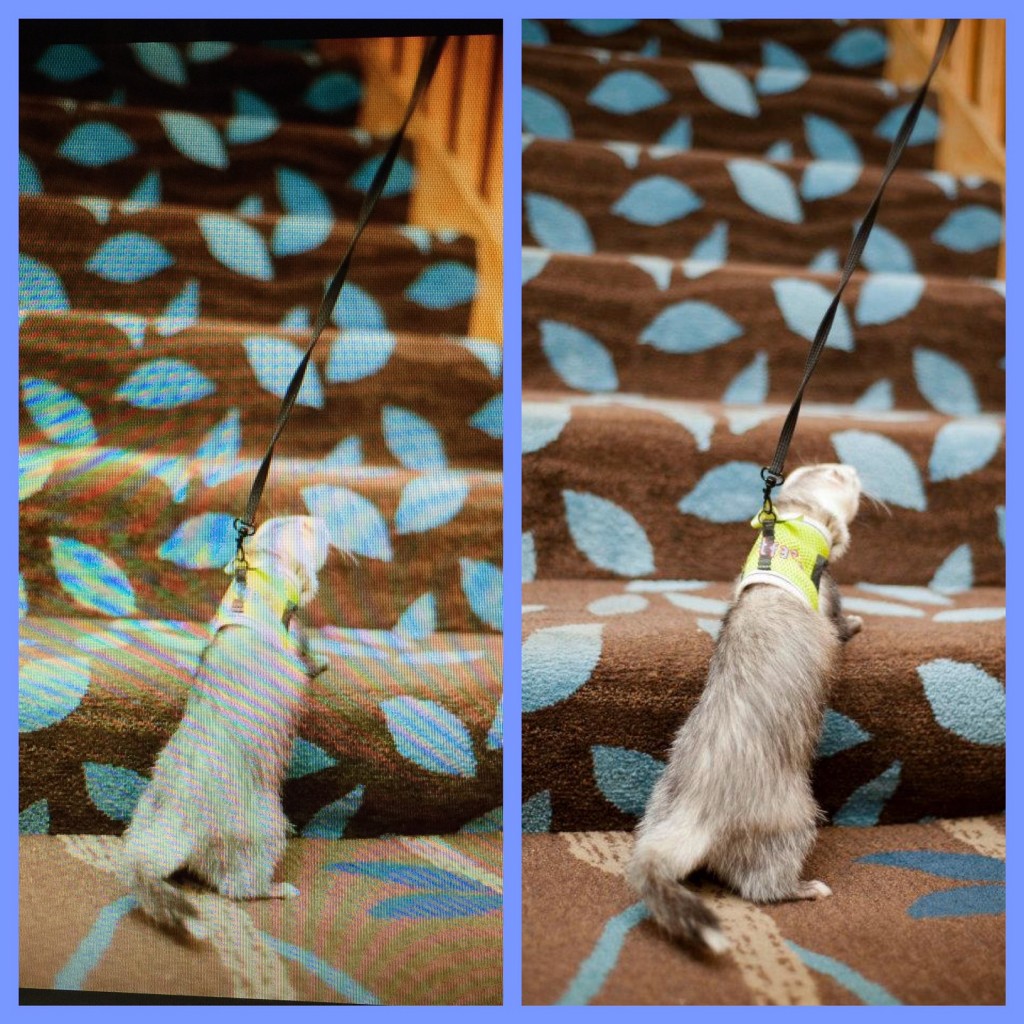
Let’s do a little experiment before we get started on the tips to make your next blog post’s images stand out and complement your prose. Which of the following images would you re-pin?
The one on the left is a big no no. Never ever ever and then remind yourself never ever again take a photo of the computer monitor/tablet device. No one wants to see those wavy lines on the image, plus it is blurry. Look at how much crisper and clearer the one on the right is. You need not be a professional nor have a super expensive DSLR camera. You should have a basic understanding of the photographic device you do use. Most images I take are put through processing afterwards, meaning Picmonkey or Canva. Is it time consuming? Yes! Is it worth a pin, a tweet, a reshare, and your reputation as a blogger to your readers and to brands? Heck, yes.
Here then are photographic tips from the BlogPaws team. Keep this post handy and refer to it often:
Telling a Story
 From BlogPaws Blogger Outreach and Communications Manager, Felissa Elfenbein. Keep in mind that Felissa works with the brands and bloggers, and she sees hundreds of images in any given week. Here are her photo tips:
- Original, high quality, bright photos of your pet or pets should be included in each post.
- There should be at least one Pinterest-ready vertical image in your post.
- There should be at least one horizontal image in your post.
- Images should help tell a story. Don’t hesitate to include words overlay-ed on your image.
- Include an image of the product you are discussing. Show it in use or in a cute image near your pet. Don’t force your pet to do something they are to happy with. Try it a different way.
- A terrified pet does not play well in your blog post.
- Don’t wait until the last minute to take your pictures. A cloudy or rainy day is that last thing you need when trying to put your best work together.
- If you are taking indoor images open the Blinds and let the light in. Stand with your back to the sun and have your pet look towards you. This will help brighten the image.
- Invest in a camera that creates High Resolution images. The more sponsored posts you take on, the more professional you are going to be expected to be. Images can make or break your post. Don’t let it be a deal breaker for you! Better images get more interaction, shared more often, and better traction for your post.
Check out Felissa’s Pinterest board for Two Little Cavaliers for examples galore.
Post Photo Processing
Once you take the photo, chances are you will want to manipulate it in some way.
“I really like PicMonkey – it is easy to use and has some great features even beginners can use to make their so so photographs look 100 times better. Don’t be afraid to crop the image so that you get rid of the random things that somehow made it into your picture,” Felissa says. “When in doubt try auto adjust a super easy click of the button that generally makes a big difference. Want to try it yourself? Use the colors option to find the neutral color to color cast your image in a better “light”. If you can’t lighten your images enough consider a cute collage of several images instead of one single image.”
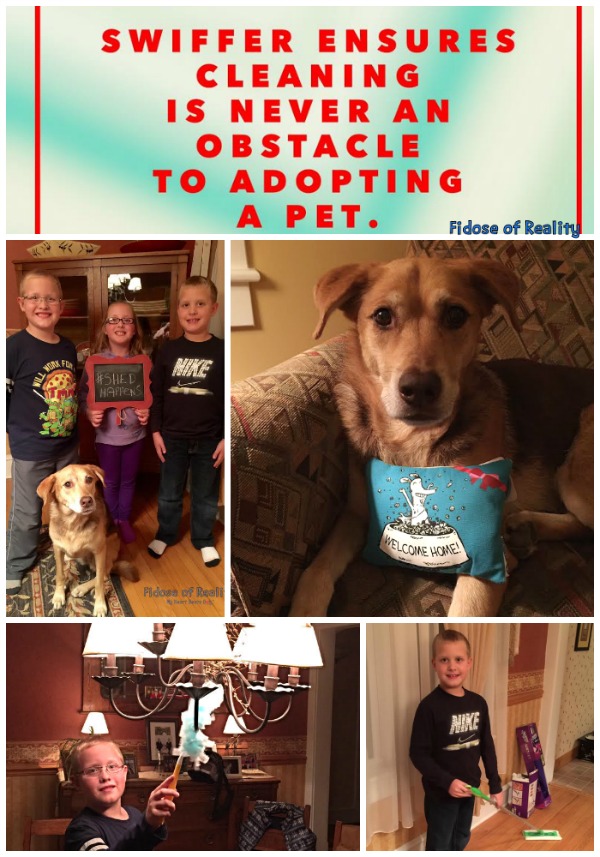
Here’s an image I, Carol Bryant, pinned in a recent brand post: Notice the collage, I touched on several elements, included product, kids, and a dog, and I topped it off with a great call out: And bonus of all bonuses: It is vertical and a perfect size for pinning.
Hot Ninja Tips
 From Aimee Beltran, BlogPaws’ Director of Community Education, is a photo pro in that she knows how to both take and manipulate share-worthy images. Here are some of her best tips:
- First and foremost, practice makes perfect! Take your camera everywhere and practice using different settings and lighting scenarios until you find your sweet spot.
- You don’t need a fancy DSLR. Start with what you have and make it work for you! A DSLR is just a waste of money if you don’t even know what you’re doing with a basic point and shoot.
- Take your photos with as much natural light as possible and just say no to flash! I have a “photo studio” room in my house where I take the majority of my blog photos because the natural light in that room is amazing. I also have artificial lighting and a light box for shooting at night or on rainy/gloomy days.
- Storyboard your blog post before you even turn the camera on. Create a checklist of your “must have” shots. This way you capture all of the mandatory shots and can sprinkle in the fun, candid shots of your pet! Storyboarding also helps me to shoot pics that I can use in social media. I intentionally leave white space in certain areas so that I can add a text overlay during the editing process. Be intentional!
- Properly stage your photos! Get rid of all the surrounding clutter. I cannot stress this enough!
- I love using Canva and Pic Monkey to edit my photos.
- Create a work flow for uploading, editing, and sharing your photos!
- Photos ARE your blog content! I would actually argue that visual content is more important than the written word because it’s the first impression of your blog. If you can’t attract your readers in a few seconds, they won’t even care what you have to say. Create an “irresistible” story with your images that entices your readers to stick around and subscribe!
Aimee’s Hot Tip
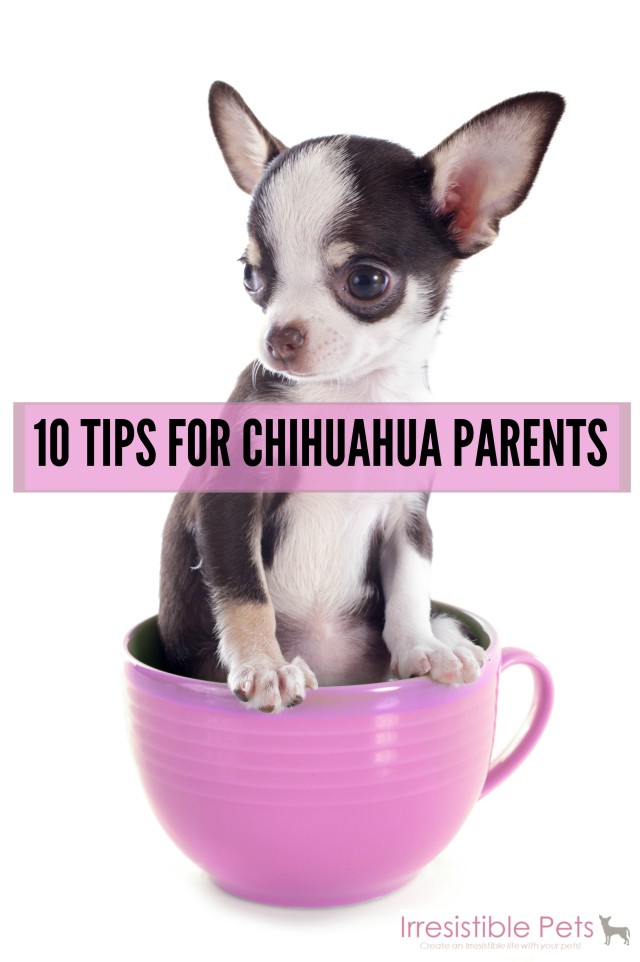
Aimee shared a success story with us recently. Simply by updating an old post that barely reached 100 views, she was able to garner thousands of visitors to that blog post. How did she do it? She embedded the post with this image, re-promoted it, SEO optimized it, and watched the traffic roll in as one of her most popular posts to date:
Note the clear image, call out, vertical landscape, unobtrusive watermark, and wham: You’ve got a formula for success.
Follow the Irresistible Icing Pinterest board here.
What Not To Do
So now that you know some of what works, what brands look for, and how to keep readers coming back for more, here is my list of 10 things not to do when posting pictures to your blog:
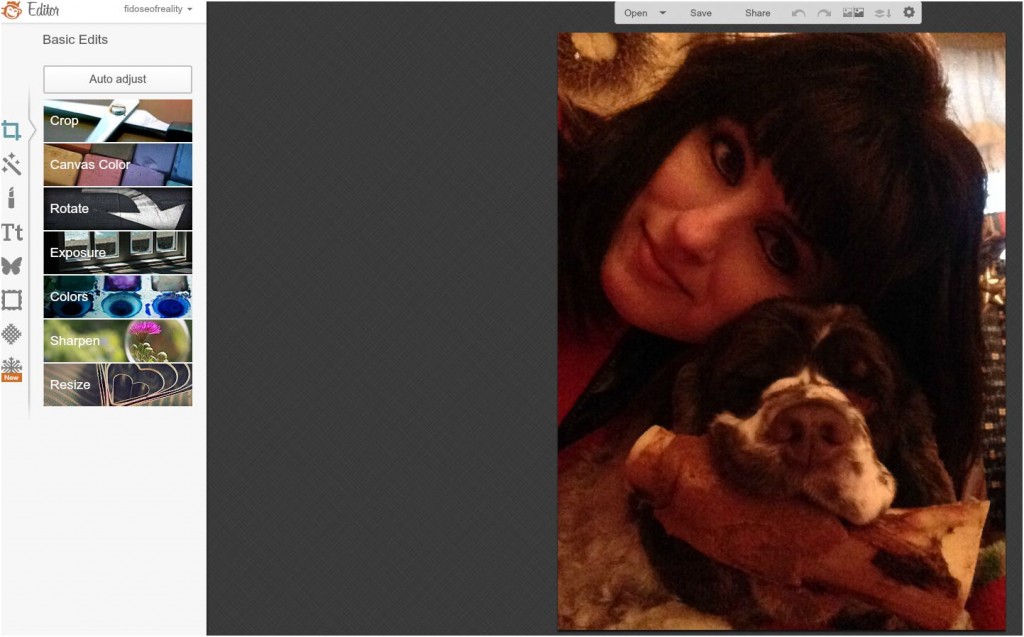
- Never post images that are too dark. You might think the images look okay, but take a second look. Dark is not good. Brands don’t want dark images. They will remember who posted crummy images. Pictures tend to stick in the minds of decision makers. It’s very easy to use a free photo software program like PicMonkey, drop the photo in, and start some light, user-friendly editing. Here’s a selfie I snapped today as an example. I uploaded it to PicMonkey. I would never use this photo as is: It is fuzzy and dark. With some manipulation, I can make this a clear, evenly toned, bright image suitable for sharing and posting.
- Don’t re-purpose images used for one brand in another blog post. If you took a photo for Dog Food brand A, don’t reuse it for Dog Food brand B, even if the product is not seen in the shot. Readers remember your shots. Brands see what you post. Be original every time.
- Infuse product shots with your pet in a natural way. The whole idea of images in brand posts is to engage the reader in such a way that he or she wants to learn more and hopefully, purchase the product you are promoting: And if you are a trusted resource, with images that speak to that level of trust, it makes sense for others to follow your example. I know I buy products from blogs I trust.
- Don’t think no one is looking: They are. We are. Ask yourself one question before posting a photo: If all a reader or a brand sees of your blog EVER is that one photo you just posted, does it represent you the way you want it to? In other words, is that image the best you can do?
- Don’t rely solely on stock images. We all use them, and they are fine. To get to know you, and to make your blog stand out, be real, showcase who you are, and infuse your pet and his or her life into those images.
- Don’t steal images and use them as your own. I wouldn’t mention if if I have not seen it done. It’s unethical, it’s not nice, and someone will catch you. You can be sued.
- Don’t share small images and expect them to help you get good traffic. I see blog posts that are very well done with really neat images: But the images are way too small.
- Don’t post images that are too small. On the flip side, a 2000 x 2000 sized image will get recognized and promptly skipped over.
- Don’t neglect Canva. I have a love affair with this product: This is photo editing at its easiest. Here’s a snapshot of the top area of Canva: Look at everything you can easily create: Drop your photo in, experiment, take a tour, and spend some time learning:
- And finally DON’T forget the tags in your images. Click here to learn how to tag images in posts.
Click here to follow my Fidose of Reality Instagram board, yet another fantastic photo platform.
So are you ready to take fantastic photos and show your creative side? What is your biggest challenge with capturing good photos worthy of blog posts?

